
Home Hoops Guide: Make a Wise Investment in an In-Ground Basketball Hoop
Shooting baskets in the driveway is one of those iconic images that we see on TV or in the movies that make us think of spending time with our families and friends. It also represents the hours that players spend in their own driveway or yard, into the night, making themselves better basketball players.

Which is why many homeowners invest time and resources into buying and potentially installing a basketball hoop.
Getting your own hoop:
- Can be a lot of fun... shooting, dunking, play 1v1, playing knock out, or a good old fashioned game of HORSE.
- Gives any aspiring players in your family a convenient way to get up more shots, practice free throws, work on scoring moves, and become a better basketball player.
- And it can have a positive impact on the value of your home.
Whether it's going to be a tool to help you take your child's game to the next level or a gathering place for family and friends to play together, a driveway or backyard basketball hoop can be a wise investment that creates a real sense of home.
As you consider what kind of basketball hoop you should purchase, experts suggest that spending a little more is worth it.
Focus on quality materials that will provide stability and durability that will improve the performance of the system, withstand the elements and hold up to wear and tear.
Add Value To Your Home
In a blog post from Berkshire Hathaway Home Services on how to positively impact the value of your home for sale, a basketball hoop is considered a nice value-add.
"If you live in a family-friendly neighborhood and get families with small children viewing your home, throwing in that driveway basketball hoop is a nice incentive for a sale."
Jason Miller, owner of Courts Fore Sports, a leading supplier and installer of athletic courts, sees that play out first hand with his installations.
"I think it has a positive impact in areas that have high concentrations of kids," Miller said.
He urges his homeowners to focus on a high-quality system that is durable and safe in order to protect your investment and reduce the risk of injury.
"It's not worth cutting corners," Miller said.
An important investment requires some thought and a few decisions. Experts in basketball hoop installation recommend that you do a few things when thinking over this decision.
- Be realistic about the space you have available and buy a hoop that fits.
- Invest in an in-ground system with the right materials.
How Much Space Do You Have?
Ideally, you have a two car driveway or larger. Around 20 feet of paved surface would be a decent amount of room to install a hoop with enough overhang so that you're not running into the pole while having enough space for a regulation foul shot of 15 ft.
Overhang, the distance from the front of the backboard to the front of the pole, should ideally be about 4 feet.
If you have limited space for overhang and need to have the pole closer to the backboard, invest in padding for the pole to avoid injuries, according to Miller.
If you want to have a regulation three point line as well as some room behind it, 28' - 30' from the pole is what you need. For a full three-point arch, you need around 40' of width.
When thinking about space and location, don't forget to consider the sun. Go into your driveway late in the day and see where the sun is going down and how that might impact your ability to shoot based on where the hoop would be.
If you believe you have enough room, a larger 60" to 72" backboard and an in-ground basketball hoop is worth considering because it will provide a truer on-court experience.
If you have less space, you will still have options and the benefits from a smaller backboard and a smaller court.
Your next step is to decide the size and material of the backboard, type of pole and rim, whether it's adjustable and additional accessories.
The Backboard - Size Matters, So Does The Material, So Do The Details
The right backboard is a key to the overall project. The importance of the backboard cannot be overstated. A flimsy backboard that is too small is just not going to be as enjoyable or as valuable in player development. It will shake or lead to diminished ball response.
Backboards range in size from 44" to 72". If you have a one car driveway, go with a 54" backboard.
If you have enough space, strongly consider a 60" or , ideally, a 72" backboard, which is regulation size for high school, college and the pros.
Larger backboards provide more shot options from different angles.
A larger backboard will require a larger pole and should be structurally sound. Purchase a thick board with steel tubing in the frame. A thin backboard will shake and vibrate or result in dead shots.
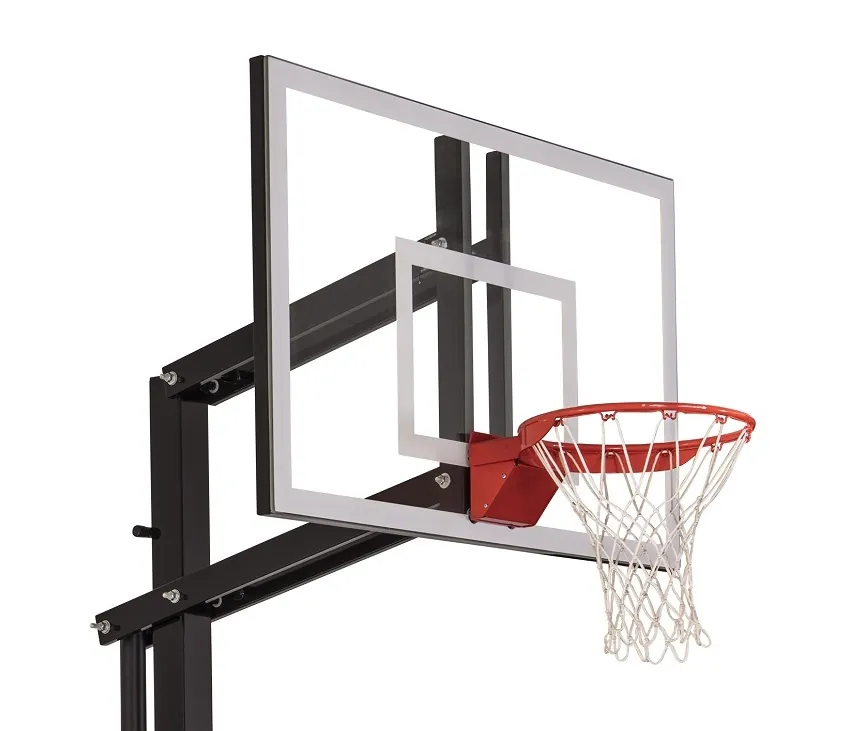
Avoid Narrow Vertical Brackets
You want to avoid narrow attachment brackets. Some hoops have narrow brackets that attach to the backboard. This greatly minimizes stability and increases backboard shake.
Here's a hoop with narrow vertical arms that are more susceptible to back shake and movement from the ball or wind. (See how the vertical brackets in the middle of the glass are close together?)
This hoop below shows an example with sufficiently spaced (wider) vertical brackets that allow for excellent stability:
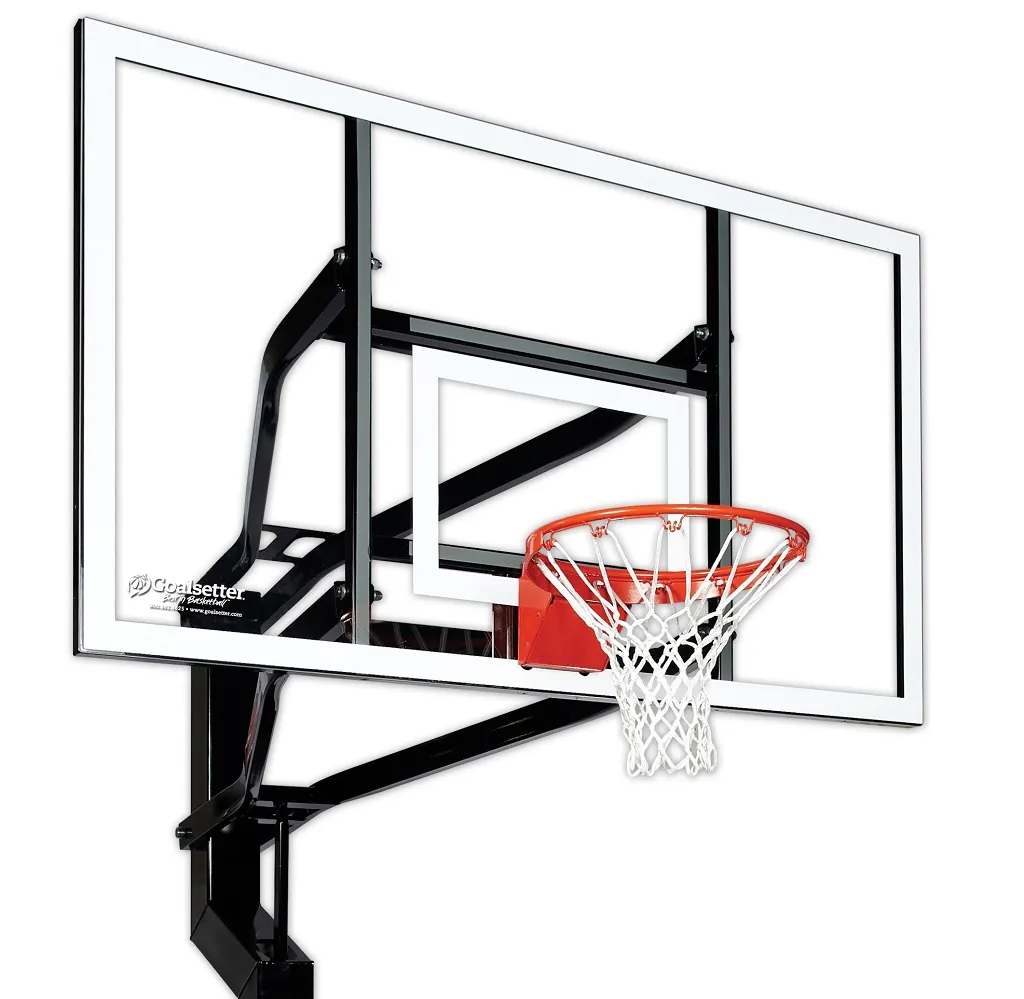
Link to This 72" Basketball Hoop
A steel frame with sturdy wide angle attachment arms for the backboard will ensure your hoop is providing the best possible feedback to your players by reducing backboard torque while also dampening noise. This is an example of a structural detail that focuses on durability and the extension of a system's performance, useful life and appearance.
Backboard Material
The material used in the backboard can affect how the ball bounces and the overall durability of the hoop.
Tempered glass is the preferred material. It is the material used for most indoor hoops at the collegiate and professional levels. It provides the truest bounce and spin. It is shatter proof so it is safe.
Experts recommend a tempered glass hoop with rounded edges to reduce the potential for injury. Again, focusing on high quality materials and details will provide your best return on investment.
Acrylic hoops are lighter weight and are less susceptible to vandalism. They are more popular in public areas. Although it might be necessary to choose acrylic, most players will see a difference in the bounce of the ball off the backboard.
The Pole: Think Square and One-Piece.
The pole is also a very important part of any basketball system.
Some in-ground systems have two or three-piece poles. But experts recommend a one-piece pole. A one-piece pole is more resistant to rust and corrosion and just as importantly provides a truer feel for the overall system by significantly reducing vibration and shake. It can also better handle those inevitable dunk sessions by the entire neighborhood.
A 4" - 6" diameter pole provides excellent performance and stability that allow for aggressive games and true bounces. Square poles provide more rigidity than round ones.
Also consider 7-gauge thickness on the pole, it is 1.5 times thicker than the 11-gauge typically seen with in-ground poles.
If you have the choice, consider a pole with a powder coating finish rather than a paint finish. A powder-coating finish can provide better protection against outdoor elements that would lead to chipping, peeling and rust.
Miller highly recommends including padding for the pole as well to reduce the possibility of injury while also protecting the finish on the pole.
The Rim - Breakaway Dunks Need Breakaway Rims
Remember, the rim is the piece of the system that takes the most physical impact, including shots and dunks. Another wise investment is to purchase a rim that can withstand your backyard dunk contests. If you believe that your players will spend some time trying to show off their Zion-like dunking ability, a breakaway rim is highly recommended. The spring absorbs the shock of the dunk (and hang) which also increases the durability and longevity of the rim.

Make it Adjustable - It's Important To Let Your Hoop Grow With Your Kids.
Most parents don't think about this -- a 10 foot hoop and a standard ball is way TOO HEAVY for most kids under 13 to shoot with proper form.
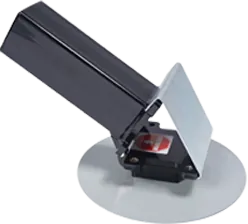
So guess what happens? Kids compensate by dropping their shoulder, thumbing the ball with their off hand, and/or chucking the ball up there. And they DEVELOP BAD SHOOTING HABITS. A 10 ft. height is also too high for kids if you want them to develop properly. Heaving shots with a ball that's too large promotes bad form and fundamentals. And it's not fun. So for young kids, we recommend lighter basketballs and adjustable hoops that you can lower to the proper level. USA Basketball recently released guidelines for rim height for youth basketball. They recommend 8-foot baskets for ages 7-8 and 9-feet for ages 9-11, along with balls that are smaller in circumference and lighter for young players. An adjustable basketball hoop serves two purposes. It allows your players to properly develop on rim heights that grow with them, and to increase the fun factor of your home court. Adjustable Hoops are Fun! Face it. There is nothing more fun than throwing one down in your driveway. Social media is full of videos of Giannis-wannabes bringing down the one handed hammer in their backyard. But the majority of the human race can't dunk on a 10-ft rim. Choose a system that will enable you to choose from a regulation-height of 10' down to as low as 6' for younger players on an offset pole. Remember, a lowered hoop presents hazards for vehicles and people using the driveway. Be careful when lowering the hoop. As we mentioned, a well-built in-ground basketball hoop will enhance your family's experience and positively impact your home value. But an in-ground system shouldn't have to be difficult to remove or move in case you need it. Most industry-standard systems will use a J-bolt anchor to secure the pole permanently to the ground. But homeowners should look at a hinged system that's easier to install, deeper in the ground and provides the homeowner with the option of easily taking the hoop with them if they move. "The hinge is an important feature and people don't necessarily think about it," Miller said. The hinge allows 2-3 people to install the pole and backboard without a ladder. If you have the proper equipment to build a basketball hoop - a backhoe or hole digger, leveling equipment, cement mixer - by all means take on the project. If you don't have that kind of equipment but have some friends, a post-hole digger, patience and some time, then installing a hoop can be a doable DIY project. The most physical part is digging the hole. You need to follow manufacturer instructions -- but the hole is usually around 4' deep and about 18" around. It can be dug by hand with a pair of post hole diggers. Installing the in-ground anchor is critical to the overall stability of your system so the proper depth of the hole and leveling the anchor is very important. Make sure that you are below the frost line and there is enough concrete weight to offset the weight of the goal. If the hole is dug well, the rest of the project should go smoothly. If planned well, the installation will take place over two days, approximately four-five days apart. The first day can be done solo if necessary. You will be digging the hole and installing the anchor system. The second day requires some help by one or two people. Always remember to check for underground pipes and/or utilities and adhere to homeowners association rules if necessary. Tools and Materials Needed: Hole digger, concrete, concrete form, tape measure, level, ladder, saw horses Day 1 : Dig Hole, Install Anchor Steps: Day 2 - (4-5 days later) - Raise The Pole Steps: For the majority of us, working with a professional will reduce the risk of costly errors and injury and ensure a safe and secure playspace. For best results, utilize an installer that specializes in athletic courts. Contact us if you have any questions, need help with installation or need any help choosing a basketball hoop. Our experts are here to help. If you're in the market for a hoop, you can look at the these high quality hoops for sale.
Are basketball poles (in ground) supposed to have "give?"
Ideally, they do not "give" or "shake"... because that affects whether the ball will go in the basket for the initial shot and follow up shots. Our hoops for example, assuming they were installed correctly, do not shake at all.
Thanks for sharing such an informative blog.
Request information on a In-Ground Goal W/installation cost. Choose a Hinged System - Give Yourself Some Flexibility
Installation - Do It Yourself or Choose A Professional
Have Any Questions? Need Any Help?
Comments
Most Likes First
Oldest First
Newest First
Jan Rodick says:
7/17/2021 at 6:02:08 PM
In other words, should they continue to shake for several minutes after a shot has been made????
Or, should they be sturdy and not move at all?

Jeff Haefner says:
7/18/2021 at 7:56:24 AM
Kelly says:
5/22/2020 at 5:28:49 AM
Tim Parison says:
12/12/2019 at 8:47:11 AM
Request the following:
2-54-60in backboard goals, with ability to adjust the height.
Please provide a reference in the Kansas City area, that can warrant the installation.
Please advise this is for a non-profit organization.
r/
Tim Parison


 Facebook (145k Followers)
 YouTube (152k Subscribers)
 Twitter (33k Followers)
 Q&A Forum
 Podcasts