How To Install Your Own Inground Basketball Hoop
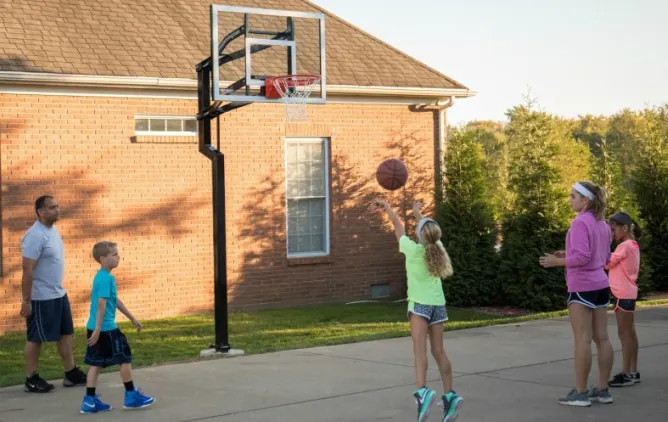
If you love basketball and want to practice your shots any time of the day, purchasing your own basketball hoop is the best option.
There are a number of different basketball hoops available, but in-ground hoops are a better option because they provide you with stability and professional-level experience.
There is a lot to consider when purchasing a basketball hoop e.g. choosing the right seller, the perfect location, the ideal backboard size and the type of pole etc.
If you are having trouble knowing what suits you best, check out our Home Hoops Guide.
Know what you want, but don't know where to find it? Check out some high-quality stuff here.
This article is a step-by-step guide on in-ground basketball hoop installation.
To get FREE Youth Ball Handling Workouts, click the banner below
Before You Begin with The First step, Keep A Few Things In Mind
- Find a suitable ground where you can fit your basketball hoop. The area must ideally be flat and paved e.g. driveways. The ideal scenario should be to have enough space to accommodate your hoop and the number of players.
- Overhang is the distance between the pole and the backboard, and affects how much room you have to land after you shoot layups. For good balance and safety, 2 feet to 4 feet of overhang is ideal. Anything greater than that could cause shaking because the weight of the backboard would be suspended too far.
- Take into consideration the position of the sun when installing your basketball hoop. Face the hoop towards the north, so the sun does not get in your eyes.
- Make sure the goal is at least 20 ft. (7m) from any overhead power lines, and no overhead power lines are within a 20 ft. (7m) radius of the goal.
- Make sure you have enough room to shoot 3pt shots at tops, wings and corners. If you want to have a regulation three point line as well as some room behind it, 28 - 30 ft from the pole is what you need. For a full three-point arch, you need around 40 ft of width.
- Before you dig a hole, you must contact Call Before You Dig (dial 811) to check for any underground power, gas, telephone, water and other utility lines.
Tools and Materials: Spade, Wheelbarrow, Shovel, Cement Trowel, Tape Measure, Stir Rod, Level, Auger, Hoe, 10-14 60 lb Bags of Dry Concrete Mix, Water, Rubber Mallet, 1/2" Drive Torque Wrench, Steel Punch, Screwdriver, Stepladder.
1. Dig A Hole
Digging the perfect hole for your basketball hoop is vital.

The most important thing to keep in mind is that the hole is deep enough, and of the right size, so the metal bars that form the anchor fit perfectly. This will provide stability to your basketball hoop.
You can dig by hand with a shovel, or use an auger or other digging equipment.
The hole should be 48" to 50" (1.2 m - 1.3 m) deep and 16-18" (0.4 m - 0.5 m). Follow the instructions manual to check the exact measurements required for the hole.
Remember, a strong foundation is your key to success!
2. Pour The Concrete
Now that you have dug the hole, the next step is to pour the concrete.
Installing an in-ground hoop would require 10-14 60lb bags of concrete, but it is recommended that you buy an extra bag or two just in case you need them.
Mixing the concrete can be a tricky procedure. You need to make sure that the right amount of dry concrete and water is used. If the mixture is too thin, it will lack the strength required to hold the pole, and if it is too thick, you will struggle to fill voids.
For a 60lb concrete bag, 1.9 liters of water is PERFECT!
To prepare the concrete mix, pour dry concrete in a container and create a depression at the center of the dry mix. Add water, and mix thoroughly until it's firm enough. Do not allow the mix to sit for a long period of time or it might dry out.
Fill half of the hole with concrete, and insert steel bars inside. Make sure the bars are properly aligned. Once the bars are aligned, fill the hole with concrete and level it using a trowel tool. Make sure the surface is smooth and there are no pockets of air.
When the above is done, place the assembled anchor in concrete, and push it down the concrete solution. It must be fixed deep enough so it provides stability to the basketball hoop.
It is important to make sure the assembled anchor is completely level!
Give the concrete at least 72 hours to cure, in case the weather is warm. For cooler surroundings, wait an extra day or two.
3. Fix The Main Pole
In-ground basketball hoops come with one-piece, two-piece and three-piece poles. A one-piece pole is highly recommended because it minimizes vibration and shake. It is also rust and corrosion resistant.
A 4"-6" diameter pole provides excellent performance and stability. Shape-wise, square poles are preferred over round ones because they are more rigid.
A 7-gauge thickness on the pole is preferred over 11-gauge because the former is the STRONGER choice. A thicker pole provides you with a better playing experience. It is stronger, causes less shake, and provides greater durability and professional experience.
Fixing a pole depends on the type of anchor being used.
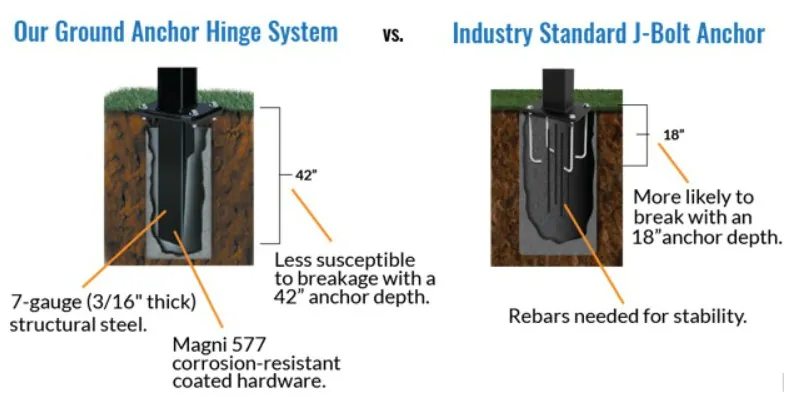
There are two types of anchors used in in-ground basketball hoops: the threaded j-bolt and the hinge anchor system.
The latter is easier to install.
With a j-bolt anchor system, you will have to lift the pole above the anchor, position it rightly, and then bolt it down to the j-bolt anchor. This process will require greater physical effort as you will have to go up and down a ladder to attach the backboard, extension arms and the hoop.
The hinge ground anchor system, on the other hand, is simpler to install, and does not require much physical effort. You can assemble the pole, extension arms and the backboard on ground, and then align the pole using the hinge mechanism. The pole is then placed in an upright position, and secured with a bolt.
A huge advantage of the hinge ground anchor system is that it can be easily moved from one place to another. When you move, you can take the fully-assembled pole with you and relocate it without much hassle.
Do not forget to follow the instructions manual.
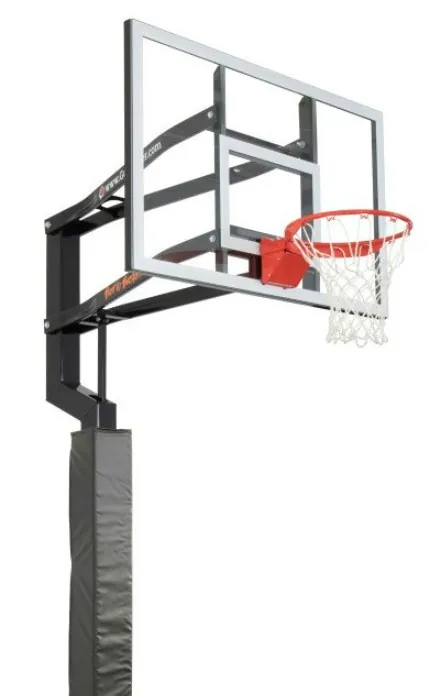
4. Install The Backboard
There are three main types of backboards: acrylic, tempered glass, and polycarbonate. For a professional experience, tempered glass is the BEST CHOICE!
Out of the three, the tempered glass provides the best bounce and spin. It is also shatter proof, and therefore safe.
Acrylic backboard is suitable to use in public places. However, it does not provide the same bounce and spin as the tempered glass backboard.
In some basketball hoop setups, the backboard is already attached to the pole, but for hoops with a separate backboard, there are a few things that one must keep in mind before installation.
Since the backboards are heavy, it is advised to use additional manpower to lift and install the backboards, while taking safety precautions. Lift the backboard up in place to the support arms, and secure it to the top mount.
5. Install The Rim And Net
Choosing the best rim for your hoop is another important step. This piece of the system absorbs the greatest physical impact, and therefore, must be durable.
A breakaway rim is recommended. It consists of a hinge and spring at the point where it attaches to the backboard, and can bend downward when a player dunks. It is DURABLE.
Once you have chosen the perfect rim, installing it would not be much of a problem.
All you have to do is fix it with screws to the backboard. Then loop the net around each of the hooks on the rim to have your net fully installed, and you are all ready to SHOOT!
Hire A Professional To Do The Job
If you have prior experience in installing a basketball hoop, or doing similar work, you might consider installing the hoop yourself.
However, hiring a professional to do the job can save you from damages, injuries and unpleasant situations since installing a basketball hoop requires a number of tools, and expertise.
Consider this: if you are going to install it yourself, you will have to buy or rent the tools, request for additional manpower, and the overall process will likely be slower than when done by a professional.
Knowing that you have spent quite a lot of money on purchasing the setup, you would not want to risk damages to save a few dollars.
Need Help?
Contact us if you have any questions, need help with installation or need any help choosing a basketball hoop. Our experts are here to help.
To get FREE Youth Ball Handling Workouts, click the banner below
What do you think? Let us know by leaving your comments, suggestions, and questions...
|
|||||||


 Facebook (145k Followers)
 YouTube (152k Subscribers)
 Twitter (33k Followers)
 Q&A Forum
 Podcasts